Archive | Main Course Recipes RSS feed for this section

Playing with Purslane

17 Jul

SUMMER SQUASH AND PURSLANE PASTA

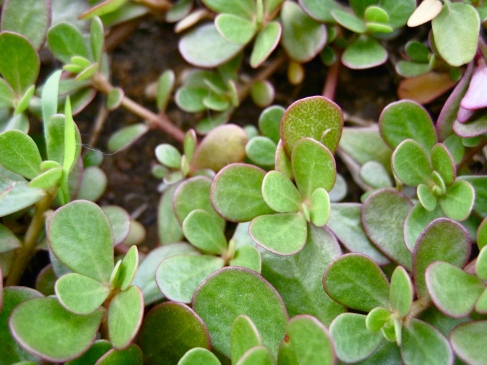
We’re getting experimental this week with a less know ingredient called Purslane. Purslane is a succulent, weedy looking plant with a mild sweet and sour flavor.  Its easily tossed into a number of vegetable recipes and salads.  Follow this recipe for a healthy and satisfying use of this ingredient.

Image

INGREDIENTS

1 bunch of purslane, chopped with stems into 1/4″ pieces

1 cup summer squash or zucchini, shaved into slices (using a potato peeler)

cooked pasta of your choosing

1/2 cup of green onion, minced

desired amount of crumbled feta cheese

White wine vinegar to taste

olive oil

1 clove of garlic, diced and sautéed if desired

1 pinch of paprika

Kosher salt and crushed black pepper

ASSEMBLY

  1. Saute the squash with olive oil, paprika, salt and pepper.
  2. In a sealable jar or tupperware add 4 parts olive oil, 3 parts vinegar, salt, pepper, garlic and shake until well mixed.
  3. Add purslane, squash, onion, feta, dressing, and any additional salt, pepper or other seasonings to taste. Toss together and enjoy!

FOOD FACT: Purslane was used historically by Europeans to treat arthritis and inflammation, improving circulatory and respiratory function.

Happy Love your Farmer Day!

14 Feb


Celebrate Love your Farmer Day: Slow Food USA

Do you love your farmer? We do! And so do Food & Water Watch & the Rural Advancement Foundation International. That’s why they’ve renamed Valentine’s Day.

This year February 14th is no longer “Valentines’ Day,” but Love your Farmer Day,  in support of the family farmers who raise our poultry. They need our help, so before we head out to buy teddy bears and chocolate hearts or make dinner for our loved ones, we’re calling the White House to demand that the USDA level the playing field for these farmers.

Won’t you join us?

The United States Department of Agriculture (USDA) is taking too long to implement rules that would level the playing field for small poultry farmers – it would protect them from big companies that force them to work harder for less and severely limits their options in raising and selling their livestock. 

On Valentine’s Day, Monday February 14th, please take 2 minutes to call the White House and tell President Obama to level the playing field for poultry farmers.

Here’s how you do it: 

  • Call 202-456-1111 to reach the White House Comment Line  
  • Wait for an operator to take your message  
  • Tell the operator that you want President Obama to ensure that the USDA implements the livestock and poultry rule. Here’s a sample of what you can say:
  • HI! Happy Love Your Farmer Day! I’m  ________ (name) from _________ (city and state or state) calling in support of the USDA’s livestock and poultry rule.  Please tell President Obama to make sure that the USDA puts this rule into practice, so that our poultry farmers have a level playing field. Thanks!  

    Tell us how it went by leaving a comment below.

    Want some more info about the rule, which you may have heard referred to as the GIPSA rule, and what it would do for poultry farmers? Read below:

    1. Allows family farmers and ranchers to find out what prices and terms of sale are being offered for livestock.
    2. Increases and ensures better market access for family farm livestock producers;
    3. Identifies violations and leads to improved enforcement and curtailment of the most abusive and unfair procurement practices used by corporate meatpackers.
    4. Stops a common practice that allows packers to avoid competitive bidding in the marketplace, keeping open market prices artificially low.
    5. Prevents meat packers from paying large volume producers higher prices simply based on the number of animals they deliver without offering the same prices to groups of producers who could collectively deliver the same number of animals.
    6. Prevents packers from offering favorable price premiums to a few preferred producers without offering them to other producers who could meet the same standards.

    This article is from the SLOW FOOD USA Blog publish 02/14/11

    Sneak Peek:

    Kale                            

    Chard                          

    Green Garlic                

    Lettuce                        

    Beets                          

    Turnips            

    Red Cabbage             

    Apples

    Weekly Recipe:
    organicauthority.com

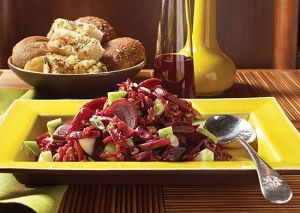
    Today’s recipe for Beet and Red Cabbage Salad doubles up on nutrient-rich vegetables: pickled beets and sweet-and-sour red cabbage. Finish the dish with crispy tart apples and crunchy toasted pecans. 

    Prep time is 15 minutes, cook time is 10 minutes, and all of the ingredients should be available at a well-stocked natural and organic food store. 

    Note: You may substitute pears for the apples or walnuts for the pecans. For added flavor and richness, sprinkle the finished salad with crumbled goat cheese or blue cheese. 

    Beet and Red Cabbage Salad 

    Makes 6 servings (about 3/4 cup each)

    1 jar (16 ounces) picked beets, whole or sliced
    1 jar (16 ounces) sweet-and-sour red cabbage
    1/3 cup red currant jelly
    1/4 teaspoon ground cloves
    1/4 cup thinly sliced green onions
    1 cup chopped Granny Smith apple (about 1 small apple)
    1/2 cup chopped toasted pecans (see toasting instructions at end of article)
    Salt and pepper, to taste

    1. Drain beets and cabbage, combining both liquids in a small bowl.
    2. Pour 1/2 cup of the combined liquids into a small saucepan; discard remainder. Add red currant jelly and cloves to saucepan; whisk to combine. Bring to a boil; reduce heat and simmer until liquid is thickened and reduced to 1/3 cup, about 10 minutes. Cool.
    3. Meanwhile, cut sliced beets in half (or whole beets into wedges). Toss beets, cabbage and green onions with cooled red currant dressing.
    4. Just before serving, stir in apple and pecans. Season to taste with salt and pepper. 

    To Toast Pecans: In preheated 350°F oven, bake nuts in a single layer on a rimmed baking sheet until they’re fragrant, about 5 to 8 minutes. Remove from baking sheet; cool. 

    Upcoming Events

    Composting and Worm Bins

    February 26 9 am to 5 pm  85.00

    This class will teach the basics behind composting and worm bins.  You will see everything from big tractor compost piles, to worm bins that will fit under the sink of your apartment. 

    Composting is the basis for growing the healthiest, most nutritious, and most disease-resistant plants.  This composting method is simple and effective.  it is so fun and satisfying that we must warn you composting can become addictive!

    Learn how to create a worm system to recycle food waste, produce rich organic castings (compost) for the garden, cultivate fish bait, and potentially reduce your garbage bill. This course will teach you how to set up and maintain a worm bin.

    You will have the chance to purchase a starter worm bin or compost bin during this class.

     Class Taught by:

    Elisa “Worm Girl” Robles & Whitney Bell

    Whitney Bell

     Whitney is an avid gardener and composter. She is inspired by the resilience and intelligence of natural systems. She received her first Permaculture Design Certificate (PDC) in 2009 at Quail Springs Learning Oasis in Cuyama, California. Here, she continued to study through the Garden Internship Program. During this time, she learned Soil Foodweb composting science with Dr. Elaine Ingam. In 2010, she followed her passion for sustainable systems design to Chiapas, Mexico, where she underwent a second PDC course. She continues to work and volunteer with various farms and gardening projects. Whitney will be traveling to Australia in October for an intensive internship in sustainable systems design at Zaytuna Farm. 


    BYOB

    CSA Volunteer Work Day

    February 26th

    8:00 am – noon

    Bring Your Own Bucket

    We’ve got the compost but not a proper spreading machine.  Help us spread the compost.  Bring your gloves, water and a bucket or shovel, rake, wheelbarrow any tool you think would be helpful to spread compost. 

    Come get your hands dirty and help Fairview Gardens spread compost.

    If you have any questions please send us an email csa@fairviewgardens.org

    Happy Love your Farmer Day!

    Lisa

    Plan a Thriving Garden

    31 Jan

     Sign up Today for our next Urban Homesteading Workshop:

    Planning a  Garden Throughout the Year

    February 12 9:00 a.m. – 12:00 p.m.   $40.00

    Click here to sign up on-line.

    Our very own Farm Manager, Toby McPartland, will be teaching “Planning a Garden Throughout the Year”.  Learn basic intensive gardening strategies, crop planning and planting tips resulting in an abundance of vegetables that grow well in our climate.  The trick is not ending up with all 40 heads of lettuce in one week. Learn how to plan your thriving garden providing abundance throughout the year. 

    Toby McPartland, Farm Manager


    CSA Members Work Day BYOB

    Bring Your Own Bucket

    Saturday 02/26/11

    8:00 a.m. – 12:00 p.m.

    Please come to the farm and help us apply compost.  We have the compost but we don’t have the machinery to spread it .  Bring gloves, a hat, water bottle, bucket, shovel, rake, wheelbarrow or just your self.  No need to RSVP just come out if you can.  Bring your muscles, big or small and help Fairview rebuild its soil fertility.   

    Sneak Peek:

    Turnips            

    Blood Oranges

    Green Garlic                

    Cilantro                       

    Popcorn

    Lettuce                        

    Spinach    

    Carrots/Cabbage

    This Weeks Recipe:

    101 Cookbooks

     Turnip Green Tart

    It’s convenient for me to make enough dough for two tart shells in one shot, so that’s what I call for here. You can always freeze the extra dough or shell for use later in the week/month. They seem to keep fine in the freezer, well wrapped, for a few weeks, but not much longer than that. Green garlic is also great in the filling in place of the garlic clove – a couple tablespoons (chopped).


    Cornmeal Tart Shell:

    2 1/4 cups / 9 oz / 255 g all-purpose flour
    1 cup / 4.5 oz / 125 g spelt flour
    scant 1 cup / 4.5 oz medium coarse corn meal
    3/4 teaspoon fine grain salt
    1 1/4 cups / 10 ounces / 280 g unsalted butter, cut in cubes
    1 large egg yolk
    1/4 cup / 60 ml – 3/4 cup / 180 ml cold water

    Turnip Green Filling:

    1/4 lb. / 4 oz turnip greens, or spinach greens, de-stemmed
    1 small clove of garlic
    2 large eggs + 1 yolk
    3/4 cup veg. broth
    1/4 cup / 60 ml heavy cream
    scant 1/4 teaspoon salt (more if broth unsalted)
    2 teaspoons Dijon-style mustard
    1 1/2 teaspoons herbs de Provence (opt.)
    gruyere cheese & a bit of crushed red pepper flakes, for topping

    special equipment: tart pans – 9-inch (23 cm) round, 8 x 11 inch (20 x 28) rectangle, or equivalent.

    101 Cookbooks

     Start by making the tart dough. Combine flours, cornmeal, and salt in food processor. Pulse in butter, 20+ pulses, or until the mixture resembles sandy pebbles on a beach. Add the egg yolk and 1/4 cup water. Pulse, trickle in more water if needed, just until dough comes together. Turn out onto a floured countertop and gather into a ball. Divide the dough into two equal pieces, shape each into a ball, press into 1/2-inch thick disks, and wrap in plastic, or place in baggies. Chill for at least an hour.

    Preheat the oven to 350F / 180C. Place a rack in the middle of the oven.

    When you’re ready to line the tart pans with dough, place one of the dough disks on a lightly floured surface and roll out until the dough is large enough to line your tart pan. I usually eyeball it – you can see in the photo the dough is about 1/6 – 1/8 inch thick. Dust underneath with flour to discourage sticking throughout the rolling process. Carefully transfer the dough to the pan. Don’t worry too much if you get a tear or hole, you can patch those up later with scraps. Work quickly to ease the dough into place, taking care not to stretch the dough. Press it along the bottom of the pan, out to the walls, and against the sides. Trim any excess dough – I use the palm of my hand against the edge of the tart pan to cut off any extra dough, alternately you can roll a rolling pin across the rim of the pan for a clean edge. Chill in the refrigerator for thirty minutes or so while you roll out your extra tart shell. Double wrap that one in plastic and freeze it for future use.

    You’re going to partially bake the tart shell before filling it, so pull the shell out of the refrigerator, dock it with a fork, making small holes along the bottom of the shell. Line the shell with parchment paper and fill to the rim with pie weights or dried beans, bake for 25 minutes. Carefully remove the pie weights and finish baking for another 5 minutes, or until the crust is dry and just barely starting to brown. Remove from oven and let cool completely.

    To make the filling: Chop the greens and garlic in a food processor. You can do this by hand as well, but in this case the processor makes quick work of this. Add the eggs and yolk, pulse. Then the broth and cream. Lastly, incorporate the salt, mustard, and herbs. When you’re ready to bake, fill the tart shell and bake for 30 minutes or so, or until the center is set, and has firmed up to the touch. About 2/3 of the way through I like to sprinkle with a bit of gruyere cheese. I can’t help but zap the top of most tarts under the broiler for a minute or two just prior to pulling it out of the oven – it browns up the top nicely, and lends a rustic look to it. Finish with a sprinkling of crushed red pepper flakes if you don’t mind a bit of heat.

    Prep time: 950 min – Cook time: 60 min

    Organic Farming News

    EcoFarm 2011

    Last week was the annual EcoFarm Conference in Northern California.  During the conference news spread of the alarming decision the US Government made.   Toby McPartland, our Farm Manager was attending a seminar, when they asked farmers to leave the room and write a letter outlineing their consernes over the controversial decision for the USDA to allow GMO Alfalfa. 


    *Please contact Secretary Tom Vilsack directly if you’d like to express your concerns about the USDA’s decision.  Washington Office:400 N. Capitol St., NW, Ste. 359
    Washington, DC 20001
    Phone: (202) 720-3631

    EcoFarm Attendees Criticize USDA Decision to Allow GMO Alfalfa

    Organic farmers and dairy producers at national conference voice outrage about potential for bio-contamination
    Pacific Grove, Calif. January 28, 2011- News that the USDA had approved the planting of genetically engineered alfalfa was greeted with a collective dismay and condemnation by the more than 1,000 attendees from 34 states at the Ecological Farming Association Conference, the largest organic farming conference on the West Coast. “We are appalled by this decision,” said pioneering organic farmer Larry Jacobs, President of Jacobs Farm-Del Cabo. “This is a sad day for the future of sustainable agriculture.”

    Genetic engineering is not allowed under US organic standards. The organic label assures that consumers are not exposed to genetically engineered organisms through their food choices. According to Don Huber Ph.D., emeritus professor at Purdue University, the commercialization of genetically engineered alfalfa could result in the contamination of organic and conventional alfalfa within five years. Such contamination threatens organic markets and diminishes non-contaminated, non-GE seed options for organic producers.

    In an official statement yesterday Agriculture Secretary Tom Vilsack said, “After conducting a thorough and transparent examination of alfalfa through a multi-alternative environmental impact statement (EIS) and several public comment opportunities, APHIS has determined that Roundup Ready alfalfa is as safe as traditionally bred alfalfa.” Alfalfa is the fourth-largest U.S. field crop grown annually on about 23 million acres in the U.S. and is the primary forage crop for dairy production.

    “As an organic farmer and an organic dairy processor, the decision to deregulate genetically engineered alfalfa is devastating for our industry and it could put our business at risk,” said Albert Straus, President and owner of Straus Family Creamery. “Since 1994, I’ve been committed to organic principles. We are the first and only dairy brand to achieve Non-GMO Project verification for all of our products.”

    “Alfalfa is an essential feed for our dairy cows and provides the essential forage in the diet of organic cows,” he continued. “With the potential contamination of organic alfalfa, this could significantly harm the organic dairy industry.”

    Sustainable food systems advocate Michael Pollan, author of The Omnivore’s Dilemma, agreed with farmers’ concerns. “It’s hard to understand why the Obama Administration would put the organic industry at risk for the sake of an unnecessary and soon-to-be obsolete product like Round-up Ready alfalfa. This is a bad solution to a problem that doesn’t exist, since 93 percent of alfalfa hay is grown without any herbicide at all.”

    EcoFarm President Thomas Wittman added, “The ruling by the USDA Secretary disregards the organic farmers, the dairy industry, and the environment, and I am confident that the decision will be reversed in court.”

    The USDA announcement was delivered from the podium at the conference, energizing EcoFarm attendees to mobilize their constituency and question the Obama Administration’s commitment to the health and welfare of the American public.

    Zucchini Pancakes with Walnuts and Feta

    7 Jun

    I just made this recipe for a potluck on Friday and the whole batch was gone in seconds. I wish I would have doubled the recipe to have leftovers for weekend picnics.

    • 1 pound zucchini, peeled and coarsely grated
    • 3 green garlic stems or leeks
    • 4 eggs, beaten to blend
    • 1/2 cup all purpose flour
    • 1/2 cup chopped fresh herbs or 1 1/2 Tablespoons dried herbs (dill, parsley, savory, rosemary)
    • 1/2 teaspoon salt
    • 1/2 teaspoon ground pepper
    • 1/2 cup crumbled feta cheese (about 3 ounces)
    • 2/3 cup chopped walnuts (about 3 ounces)
    • Olive oil

    Place zucchini in colander. Sprinkle zucchini with salt and let stand 30 minutes to drain. Squeeze zucchini between hands to remove liquid, then squeeze dry in several layers of paper towels.

    Combine zucchini, chopped green onions, 4 eggs, flour, herbs, 1/2 teaspoon salt and pepper in medium bowl. Mix well. Fold in crumbled feta cheese. (Zucchini mixture can be prepared 3 hours ahead. Cover tightly and refrigerate. Stir to blend before continuing.) Fold chopped walnuts into zucchini mixture.

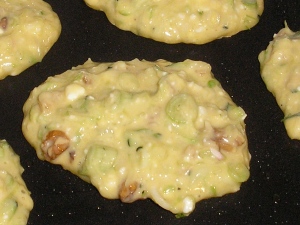
    Zucchini Pancakes on the Griddle

    Preheat oven to 300°F. Place baking sheet in oven. Cover bottom of large nonstick skillet with olive oil. Heat skillet over medium-high heat. Working in batches, drop zucchini mixture into skillet by heaping tablespoonfuls. Fry until pancakes are golden brown and cooked through, about 3 minutes per side. Transfer each batch of pancakes to baking sheet in oven to keep warm. Serve pancakes hot.

    Recipe altered from epicurious.com

    “Hits the Spot” Springtime Soup

    7 Jun

    This soup will turn your Fairview Gardens Farm Share into a delicious meal. You can also add ingredients from last week, such as green garlic or cabbage.  Throw in some beans or diced up chicken, and dinner is done!

    1. Wash and chop all the vegetables.
    2. Warm a big soup pot on your stove. Add some type of fat (butter or olive oil). Fry the leeks, green garlic, onions, or anything else from the Allium family.
    3. Add the hearty  vegetables and gently cook, until softened (such as carrots and fennel).
    4. Add fresh herbs (such as basil,  parsley, savory, bay leaf).
    5. Add liquid (such as broth, some white wine, and water).
    6. Add starch (such as cooked pasta, potatoes, cooked beans*, rice).
    7. Add delicate vegetables (zucchini, cabbage, tomatoes).
    8. Add quick cooking vegetables (chard, green beans, collards, arugula).
    9. Add flavorful garnish (basil leaf, spoon of garlic mayo, grated Parmesan, butter, pesto, or great quality olive oil). Croutons and fresh herbs are also nice.

    My favorite beans to add to this soup are cannellini, Great Northern, navy beans, and if I’m feeling crazy, garbanzo beans.

    Fennel with Garlic, Parmesan, and Pasta

    19 May

    Fennel in the Fields

    What a great, simple recipe! You can cook the sauce is the amount of time water takes to boil. The secret to this recipe is buying a hunk of great Parmesan and grating it yourself. Let me know what you think.

    Serves 4

    Ingredients

    2 Tablespoons olive oil
    4 cloves of garlic, peeled and crushed
    1 bulb of fennel, washed
    2 more Tablespoons olive oil
    1/2 cup of Parmesan, grated
    Zest of 1/2 lemon
    1 pound of pasta
    salt and pepper

    Directions

    1. Bring a pot of water to boil for pasta. Add salt and pasta when the water comes to a boil.
    2. Cut the green stems off of the fennel bulb. You can save green stems for making stock; otherwise compost them. You can use the fennel leaves as a garnish. Roughly chop the fennel. Set aside.
    3. Heat olive oil in medium frying pan. LIGHTLY saute garlic for 2-3 minutes. Do not let it brown. Add the chopped fennel. Saute for 4-5 minutes, until soft. Remove from heat.
    4. Toss fennel mixture with pasta. Add the cheese, lemon zest, and salt to taste. Enjoy!

    Root Pie with Rosemary Biscuits

    3 May

    Do you still have turnips left over from last week? If so, combine them with kohlrabi, baby leeks, beets, and carrots to make this savory pie.

    Root Pie with Rosemary Biscuits

    • 2  – 4 carrots, peeled, quartered lengthwise, cut crosswise into 1/2-inch pieces
    • 3 kohlrabi bulbs, peeled, cut into 1/2-inch pieces
    • 1 bunch of baby leeks, cut lengthwise and chopped into 1/2-inch pieces
    • 1 bunch of beets, cut lengthwise and chopped into 1/2-inch pieces
    • 1 turnip, peeled, cut into 1/2-inch cubes
    • Other optional vegetables to add: collard greens, celery, chard, or kale.
    • 1 ounce dried porcini mushrooms, broken into 1/2 inch pieces, or fresh mushrooms, diced. 3 tablespoons butter
    • 3  onions
    • 4 large garlic cloves, chopped
    • 1/2 teaspoon minced fresh rosemary
    • 1/2 cup all purpose flour
    • 3 cups stock
    • 1/4 cup heavy whipping cream
    • 2 tablespoons imported dry Sherry

    Biscuits:

    • 2 1/4 cups unbleached all purpose flour
    • 1 tablespoon baking powder
    • 2 teaspoons minced fresh rosemary
    • 1 teaspoon salt
    • 6 tablespoons (3/4 stick) chilled unsalted butter, diced
    • 1 1/3 cups chilled cream

    Fava Bean Pita Sandwiches with Herb Sauce

    5 Apr

    Fava beans sauted with onion in olive oil. Photo: MGomez

    1/4 cup of olive oil
    1.5 lbs fava beans, in pods
    1/2 onion, chopped
    Juice of 1/2 lemon
    4 pita breads, cut in half
    4 lettuce leaves
    4 carrots, shredded

    Herb Sauce (Shake these together in a glass jar):

    1 cup of plain yogurt for serving
    1 teaspoon cumin
    1/4 cup cilantro (if you have it)
    1 clove garlic, minced
    juice of 1/2 lemon
    salt and pepper to taste

    1. Shell, blanch, and peel fava leaves.

    2. Heat oil in a skillet, add the onion and saute on medum-low heat for 5-6 minutes. Increase heat to medium, add fava beans and cook until slightly browned (about 3 minutes). Add the lemon juice, herbs, salt and pepper. Saute for another minute, then remove from pan and stuff into pitas. Top with lettuce, carrots, and any other salad fixings. Pour yogurt sauce inside of pita. Enjoy!

    Spring Pesto with Fava Leaves and Green Garlic

    31 Mar

    This recipe completely changed my relationship with fava leaves. Sure, I added them to quiches and sautes, but the leaves never inspired me as a culinary ingredient. So after reading about fava leaf pesto in the New York Times, I decided to see if this sauce could be as creamy, spicy, and wonderful as traditional pesto. Try this recipe for yourself and you’ll see why I’m a convert.

    2-3 cups of fava leaves, washed
    1/3 cup of pine nuts (you can also use California sunflower seeds for a local food alternative)
    1 green garlic stem (washed and chopped), or 2  garlic cloves (chopped)
    1/2 cup Parmesan cheese, grated
    1/2 cup of olive oil
    salt and pepper to taste
    Directions: Pulse all ingredients in a food processor until creamy. Toss with pasta or spread on baked polenta. This is just another reason to love spring.

    Southern Stew

    29 Mar

    My sister, who lives in Florida, shared this down-home recipe with me. Turn to this recipe when you have collard greens and want some comfort food. I served it with cornbread and salad for a complete meal.

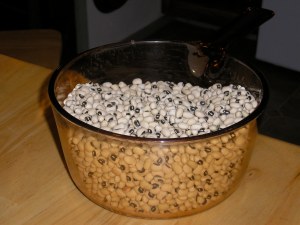
    Black Eyed Peas for Stew

    Black Eyed Peas for Stew.

    • 4 tablespoons oil
    • 2 medium onion, chopped
    • 1 lb cooked ham, chopped (I left out the ham)
    • 1 carrot, peeled and finely chopped
    • 2 garlic cloves, chopped (I used green garlic)
    • 1 bunch collard greens, finely chopped
    • 1 (14 ounce) can chicken broth
    • 5 cups water
    • 1 bay leaf
    • 1/2 teaspoon red pepper flakes
    • 2 (16 ounce) cans black-eyed peas
    • 2 teaspoons cider vinegar
    • salt and pepper

    Directions

    1. Heat oil in large saucepan over medium heat; add onions, ham, carrot and garlic.
    2. Cook, stirring occasionally, until onion is soft; add collards, broth, water, bay leaf and red pepper flakes to saucepan and simmer until greens are tender, about 25 minutes.
    3. Rinse and drain black eyed peas; semi mash one can of peas in a bowl; add those peas and other can into soup and simmer 5 minutes; season to taste with salt and pepper; stir in vinegar.
    4. Don’t omit the vinegar by the way. It truly adds something to it and gives it a much more southern taste for lack of a better way of putting it.